Simple MacOS Front-end Environment Setup Guide
March 22, 2022
Hello! This is a companion guide to a YouTube video I am making. I will update this post with the link once it’s available.
This post will be a pretty straightforward reference; I won’t elaborate on or justify my choices here like I do in the video.
This is an opinionated guide; you’re not obliged to do everything on this list, or necessarily in order. I have chosen these steps in this way to minimize ambiguity, while still setting you up for success.
Click each of the following sections to maximize them.
Install and configure Firefox
Visit https://www.mozilla.org/en-US/firefox/new/ to download and install Firefox.
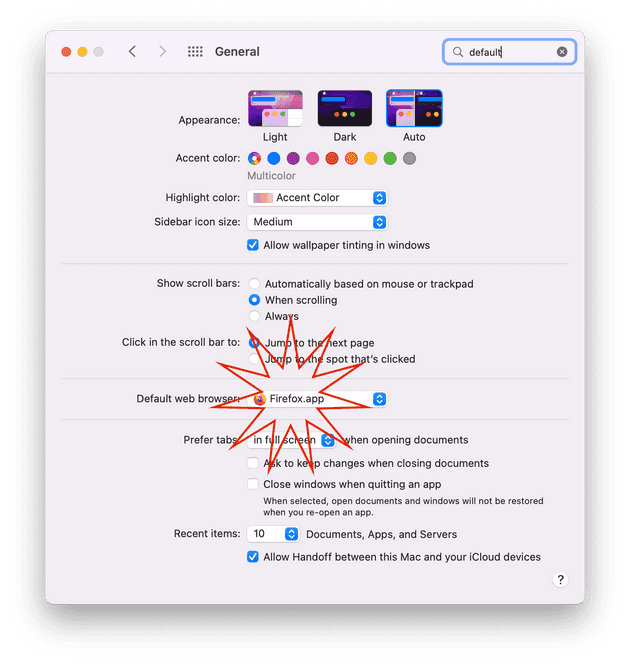
Open System Preferences. You can open System Preferences by clicking the apple logo at the top left of your screen, or using Spotlight Search.
Open the “General” preferences.
Select Firefox as your default browser.


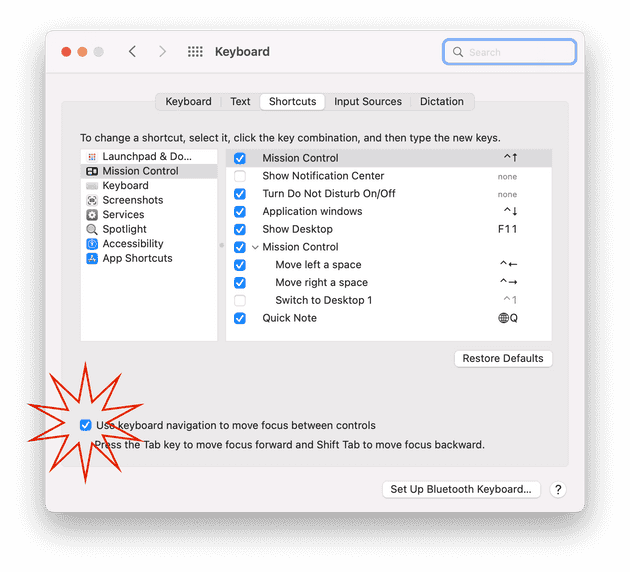
- Go to the shortcuts tab and enable keyboard navigation.

Install and configure VSCode
- Visit https://code.visualstudio.com to install VSCode.
- Once it is installed, install the Prettier extension by clicking the four square icon on the left sidebar and searching for Prettier.
- Open settings by pressing the command and comma keys at the same time.
- Search for "formatter" in the settings search, then set Prettier as your default formatter.
- Select the "format on save" option.
Configure shell and install XCode
- Open Terminal. You can do this from Spotlight search by pressing the command key and space bar at the same time, then typing "Terminal". Then press enter to open it.
- Run
code ~/.zshrc - In VSCode, add
which -s code && export EDITOR="code --wait" to the opened .zshrc file and save it.
- From Terminal, install XCode with the command
xcode-select --install.
Visit https://brew.sh/ and copy the installation script. Paste it in terminal and press enter. Follow the instructions that appear on the terminal.
Type brew -v to confirm Homebrew has been installed.
Visit https://github.com/nvm-sh/nvm and copy the first install script. Paste it in terminal and press enter.
Type nvm -v to confirm that it has been installed.
In the terminal, write nvm install --lts and press enter.
In terminal, write npm i -g create-react-app and press enter.
Create and run your React project
Run these commands in order:
create-react-app your-app-namecd your-app-namecode .npm start
This will open your browser with your first React project. If you edit and save App.js in VSCode, the changes will appear in your browser!
That should do it! Please let me know if you encounter any errors or inconsistences in these instructions.


